
How To Insert Ads On WordPress: Monetising Your Blog With Adsense And Advertising

By Melissa Ng | Last Updated 17 October 2023
How To Monetise WordPress Blog with Ads
What are ads?

Ever stumbled upon catchy banners or pop-ups while surfing the web? Those are ads, or advertisements – digital shout-outs aiming to pique your interest in a product or service. Just like billboards or TV commercials, ads serve to entice you into making a purchase or taking a specific action. These promotional tools come in various forms: text-based messages, visually appealing display ads with images, or the dynamic rich media ads with interactive elements and videos.
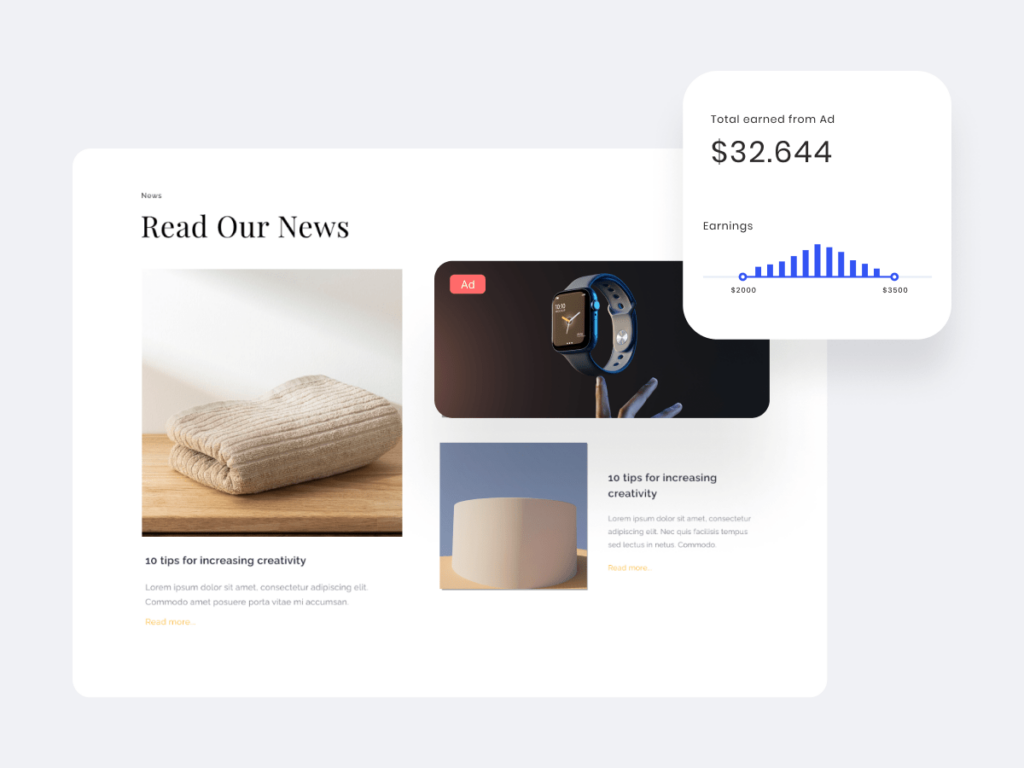
For those hosting websites or blogs, especially on platforms like WordPress, ads represent more than just promotions. They’re a potential goldmine. By letting third-party advertisers use a bit of your site’s space, you can earn blog revenue. Think of it as leasing out parts of your digital real estate. With the right approach, this can become a consistent income stream, bolstering the rewards of your online endeavors.
Do I need to place ads on my WordPress website?
You might be wondering, “Should I really insert ads all over my WordPress site?” Well, the short answer is, it’s entirely up to you. Placing ads isn’t a requirement, but it’s like having a little side gig for your blog or website. If you fancy some extra cash flowing in without doing the heavy lifting, ads can be your best buddy. However, there’s a little catch. It’s not just about slapping ads here and there. Think of it like seasoning your favourite dish – you want just the right amount to enhance the taste, not overpower it.

Now, diving into the nitty-gritty, it’s all about strategy. Your website is like your digital home, and while ads can bring in some rent money, you don’t want them taking over the entire space, right? Striking a balance is the name of the game. The goal is to create a space where ads and your core content coexist harmoniously. If done right, you could have a steady stream of income without ruffling any of your visitor’s feathers. But remember, too many ads or ones that feel out of place might just send your readers scurrying away, and also punished by Google with the latest Helpful Content Updates punishing ad ridden pages. So, tread carefully and choose ads that align with your site’s vibe and values.
How To Make Money On WordPress?
What is Google AdSense?
Imagine you’ve got this awesome WordPress site, and you’re thinking, “How can I make it work a little harder for me?” Enter Google AdSense. It’s like the fairy godmother of the online ad world, a step up into monetising content even if for small websites. AdSense is a nifty program from the tech giant, Google, that helps you sprinkle some money-making magic on your content.
With AdSense, your site gets to showcase ads that are usually relevant to your visitors and your niche. No random, out-of-the-blue advertisements here is the goal! Instead, Google taps into its colossal ad database to serve up ads that vibe with your content, be it text, display, or those snazzy rich media ones.
But here’s where it gets even cooler. AdSense is super flexible, allowing you to position ads in the places that make the most sense for your layout, like that cozy sidebar, the footer, or even snugly embedded within your blog posts.
And the cherry on top? You get paid every time someone clicks on these ads, thanks to their cost per click (CPC) system. Just to give you a sense of its popularity, over 3 million digital enthusiasts are using AdSense to pocket some passive income.
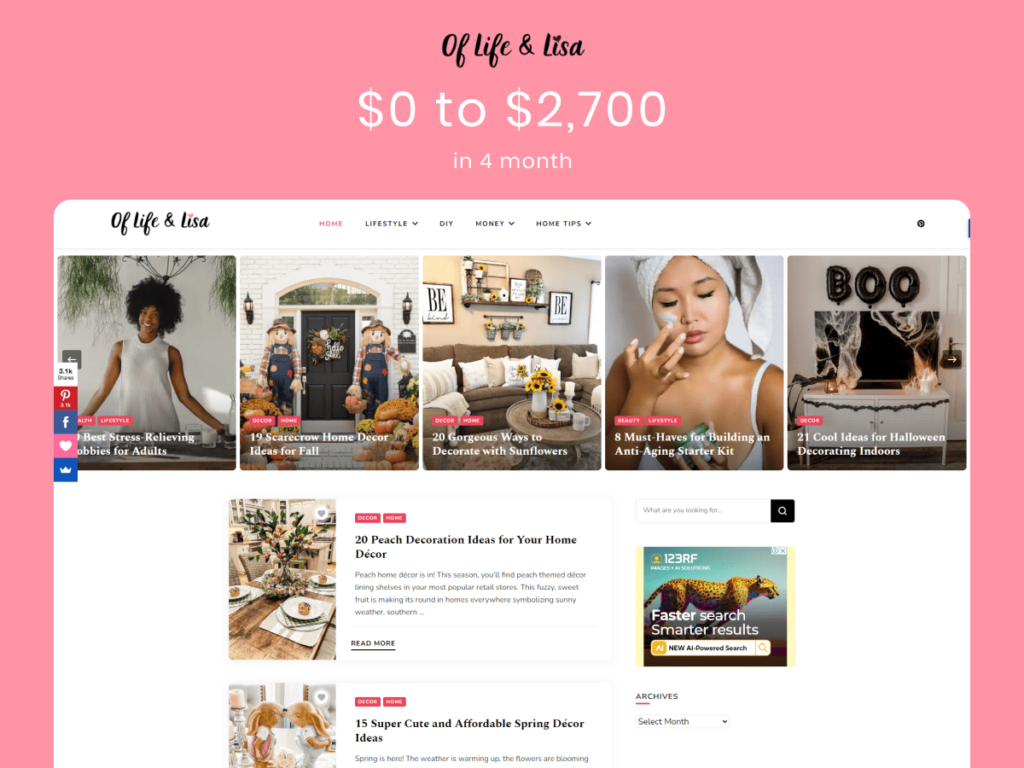
Let’s take Gelicia “Lisa” Washington as an example. Lisa is the force behind the blog “Of Life and Lisa“. What’s remarkable about Lisa’s journey is the rise she experienced with Google AdSense. In just a short span of four months, her monthly ad revenue increased by a whopping +500%, going from virtually nothing to a substantial $2,700 [2]. This impressive leap gave Lisa the financial confidence to dive headfirst into blogging as her full-time profession.
So, if you’re looking to boost your website’s earning potential, AdSense might just be your ticket to the big league.
Pros and Cons of AdSense and other Advertising Platforms
So, you’ve heard the buzz about Google AdSense, and you’re wondering if it’s the right fit for your website. Let’s break it down! AdSense is like that popular kid in school everyone wants to hang out with, and for good reasons:
- It’s Free & Effortless: Setting up AdSense is like a walk in the park – no costs, no fuss.
- Diverse Ad Formats: Whether you fancy text, image, or video ads, AdSense has got you covered.
- Global Advertiser Base: Google’s network is global, this means more people bidding to display their ads on your site, which is always a win.
- Timely Payments: AdSense respects the hustle and ensures you get paid on time.
- Deep Dive Analytics: Their tools are like a magnifying glass for your ads, helping you understand what’s working and what’s not.
However, there are also a few cons:
- Approval Can Be Challenging: Google has a reputation for being picky and stringent, so not every site makes the cut, but still its easier with Google than others.
- CPC & CPM Rates: While their cost-per-click and cost-per-mile rates are competitive and reward the publisher with most of the ad share, they tend to not always be the highest compared to some other providers. Google’s famous automation can only achieve so much however for effective advertising, and more stringent and cohesive advertisers (such as Mediavine) typically reward at much higher CPM amounts.

But hey, the advertising world isn’t just about AdSense. Let’s talk about some other cool kids on the block:
Mediavine’s big benefit is quality:
- Premium Advertisors: As Mediavine’s platform has very strigent quality control, you can attract the best pool of advertisors.
- High Revenue: The difference to other advertisors can be quite remarkable. A little bit of quality goes a long way in the advertising world.
Sounds great right? Well, the fact is 99% of websites are not suitable for this platform. Here is why:
- You will need to carefully plan and invest into your website if you hope to be accepted by Mediavine, with a minimum of 50k monthly viewers, and be prepared to go through a long approval process to boot.
- You need a certain percentage of high quality website traffic, i.e. your website cannot have too much traffic from developing markets. So you must be directional with your website marketing and monitor the website traffic.
What’s special about Outbrain Ads?
- Native Advertising Pro: This means ads look and feel like the site’s content, leading to more clicks.
- Massive Reach: Trillions of impressions globally. That’s a lot of eyeballs! An attractive platform for advertisors.
But, there’s a catch:
- Traffic Requirements: They like the big players, so you need substantial site traffic to join.
- Dashboard Blues: It’s functional, but not as sleek or intuitive as AdSense’s.
Media.net’s drawcard:
- Contextual Ads Champ: Their ads often match what users are actively searching for, leading to higher engagement.
- Easier Approval: They’re a bit more relaxed about who they let in.
However:
- Non-English Markets: If your audience primarily speaks another language, earnings might be much lower.
- Approval Wait Time: A human (yes, an actual person) reviews your site, which means waiting a couple of business days for a thumbs up or down.

Choosing an Ad Provider for Your Blog
What are the features I should care about when choosing an ad provider?
So, you’ve decided to jump into the ad game for your WordPress blog. But now comes the big question: “Which ad provider should I team up with?” It’s a bit like choosing a dance partner. You want someone who complements your moves and keeps in sync with your rhythm. Here’s a handy checklist to guide you:
- Diverse Ad Sizes: A selection of ad sizes ensures that you can fit ads in different areas of your site. Google’s data indicates that the top-performing ad sizes are the 160×600 wide skyscraper, the 300×250 medium rectangle, and the 728×90 leaderboard.
- Rich Media Ads: Rich media ads, including interactive and video ads, are appealing and can generate a higher engagement rate.
- Different Types of Targeting: This ensures the ads are relevant and resonate with your audience, leading to higher click-through rates (CTR).
- Ad Control: Fancy more control? Look for features that let you pick and choose or block certain ad categories.
- Insightful Analytics: Access to reports, stats, and insights can help you understand more about how your ads are performing and how to optimise ad placement.
- A/B Testing: This performance-optimisation technique allows you to compare two versions of an ad to see which performs better.
- Revenue Generation: Clearly, the amount of revenue you can earn from your ads is a critical concern when choosing a provider.
However, remember, there’s no one-size-fits-all. The perfect ad provider for you hinges on what you want, who your audience is, and the unique vibe of your blog.

How To Get Ads On Your WordPress Blog
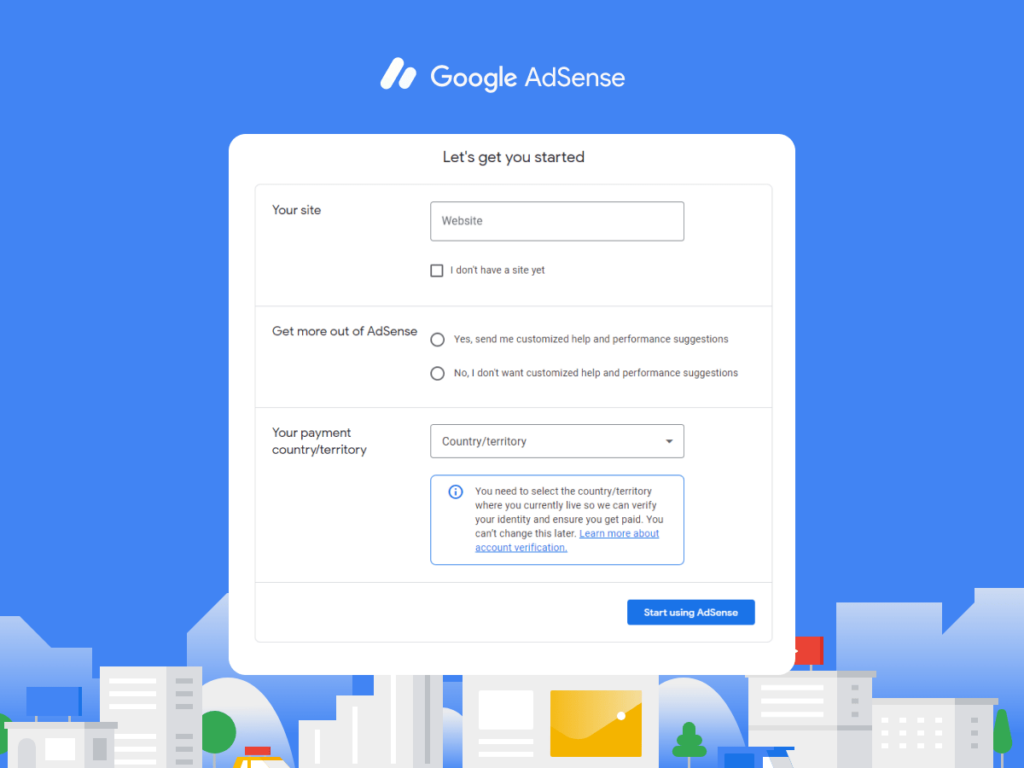
Step 1: Create an AdSense Account and Connect to Your Website
Starting with AdSense is fairly straightforward. If you’re logged into your Gmail account, you’re halfway there already.
Here’s the basic path to get you on board:
- Visit the Google AdSense website
- Click “Get Started” on the top right to begin the account sign-up process.
- Enter your website URL and email address.
- Hit “Save and continue”.
- Select your country and accept the terms & conditions on the next page.
- Finally, create your account.
Once your account is created, you’ll be directed to a welcome screen. Here, hit “Get Started” to proceed to the “Payment address details” page. Fill in your account type (either individual or business), full name, address, and phone number. After confirming these details and submitting, your account set-up will be complete. Up next, you’ll have to add your site and get your tracking code. But more on that later.
Remember to keep in mind that approval for AdSense can take some time, as they manually review every application to maintain the quality of their network. So don’t get dismayed if your application isn’t approved immediately.
Step 2: Embed Ad Code to WordPress
Post the creation of your AdSense account, you’ll be provided an ad code to embed within your WordPress website. This could be done manually or using a plugin. Let’s delve into the details of each method.
Manually Inserting the Ad Code:
To manually place ads on your site, you’ll be dealing directly with your website’s code. Here are the steps to embed the ad code manually:
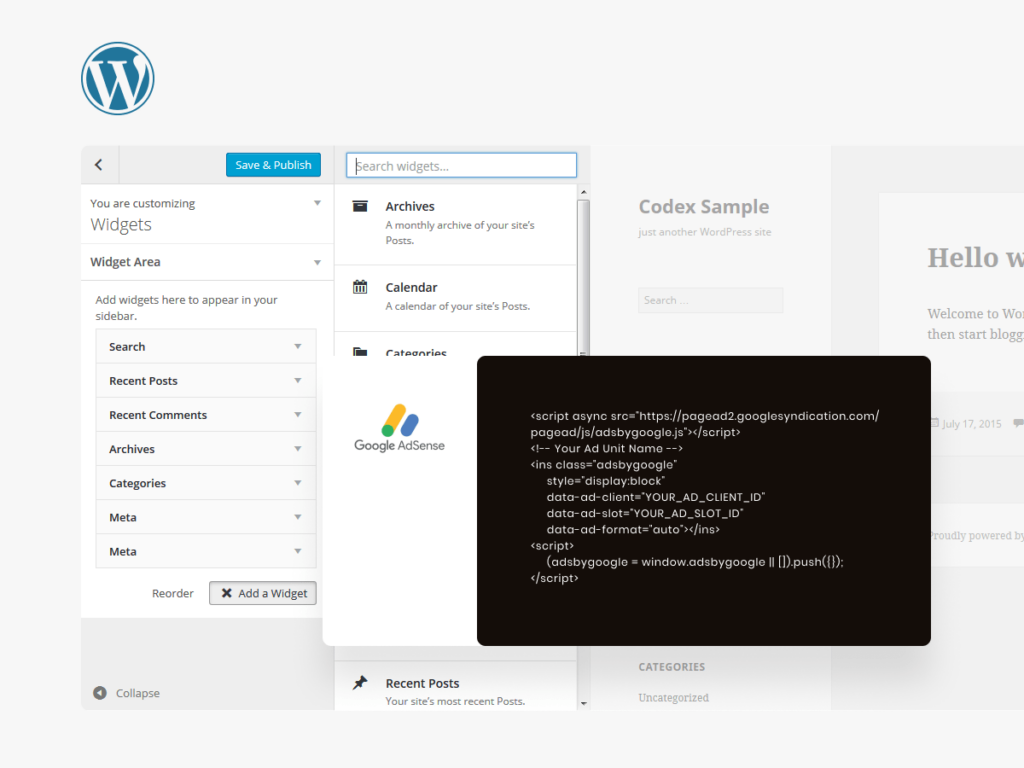
- Access your WordPress dashboard and navigate to “Appearance” -> “Widgets”.
- To add a new widget, select “Text” to choose where you want to display the ads. Let’s say you want to place it in the footer.
- Fill in the Title (or leave it empty), and paste the Google AdSense code in the Content field.
- Hit “Save” to retain your changes.
Using a Plugin:
Installing a plugin like “Ad Inserter” or “Advanced Ads” is one of the easiest ways to insert AdSense code to WordPress. For instance, with the WP AdCenter plugin, you can create an ad through the ‘create ad’ option. Then select the ad type as ‘Ad Code’, paste the code, press “Publish”, and you’re done!

Keep one important note in mind though – always place your ads strategically for the best viewability, being careful not to disrupt the user experience.
Step 3: Insert Ad Units
Upon receiving the AdSense account approval email, you’re eligible to create individual ad units and place them on your website. Follow these steps to insert the ad units:
- Log into your AdSense account and navigate to ‘Ads’ on the sidebar.
- Click ‘Overview’, and then ‘+New ad unit’.
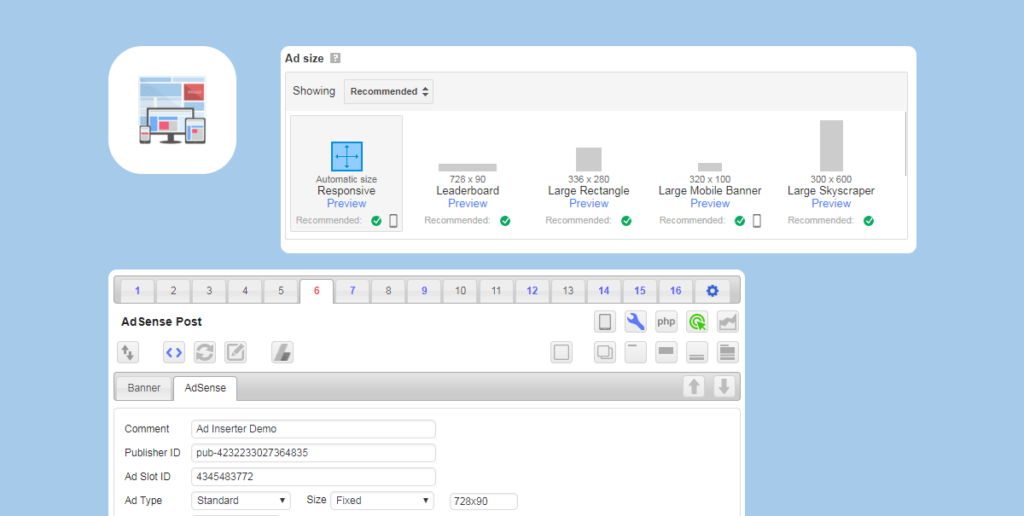
- You’ll encounter options to present a display, in-feed, or in-article ad. For this example, let’s pick ‘Display ads’.
- Customise the ad with suitable settings. Create a unique name for it, select an ad size (Responsive is suggested) and an ad type that matches your needs.
- To wrap it up, press ‘Save and get code’. The AdSense code for your new ad unit will then appear.
- Copy the code to use it on your WordPress site. You can embed this in a WordPress widget or page through ‘Appearance’ -> ‘Widgets’ in the WordPress dashboard or use the ‘Text Editor’ in the pages/posts editor.

The Power of WordPress Advertising Plugins
An Overview of Best WordPress Advertising Plugins
Manually managing ads on your WordPress site can be a handful, that’s why many bloggers choose to use advertising plugins. So, if you’re seeking to monetize your blog, let’s take a look as some popular WordPress advertising plugins to make your ad journey a breeze:
- Advanced Ads: Advanced Ads stand out due to its automatic ad injection and AdSense violation checks. It is partnered with Google AdSense, ensuring a smooth user experience.
- Ads by WPQUADS: This plugin offers the unique ability to integrate nine ad platforms. It allows you to insert customised code and also has ad-blocker detection.
- AdSanity: Known for its lightweight design, AdSanity allows for the ad rotation and provides useful click statistics.
- Ad Inserter: This highly-rated plugin offers an expansive ad management interface and offers an extensive range of options for placing your ads exactly where you want them.
- AdRotate: If you’re dealing with multiple advertisers and wish to rotate their ads, AdRotate offers comprehensive features for just that.
Each of these plugins have their own set of benefits, so consider your needs and choose accordingly.

How to use Ad Inserter and Advanced Ads Plugin
To use Ad Inserter and Advanced Ads plugin, follow these steps separately:
For Ad Inserter:
- Install and activate the plugin from the WordPress repository.
- Head to Settings -> Ad Inserter to configure the plugin.
- Select one of the blocks available for your code. Each block represents an ad.
- Paste your AdSense code in the space provided.
- Use the insertion settings to choose where and how your ad is displayed.
- Last step: hit the “Save All Settings” button.
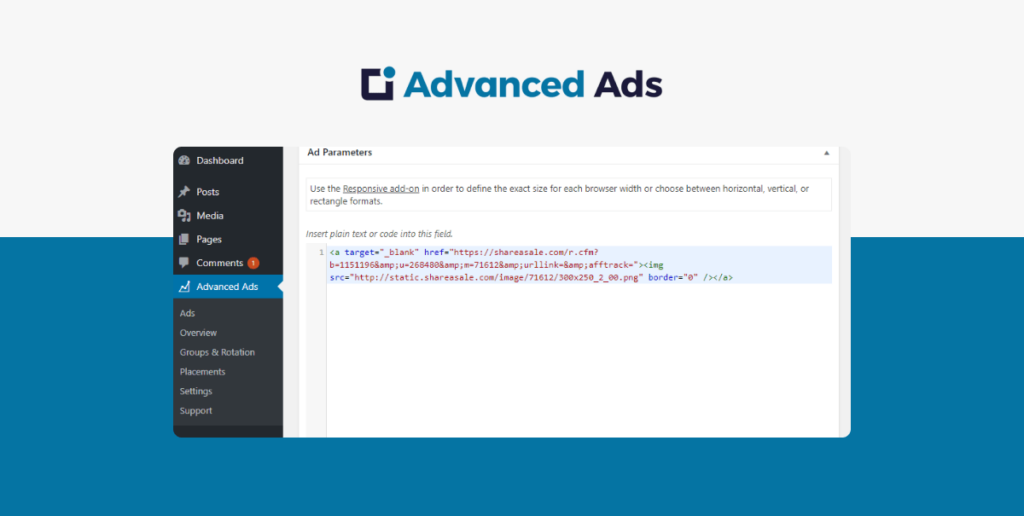
For Advanced Ads plugin:
- As always, start with installing and activating the plugin.
- Navigate to Advanced Ads -> Ads and click on “New Ad”.
- Enter a title for your advertisement and paste the AdSense code in the “Ad Code” box.
- Set the size of the ad and select other necessary details.
- Once done, click “Publish”.
- Then, go to Advanced Ads -> Placements. Here, decide where on your website the ad should appear.
- Complete the process by hitting “Save New Placement”. Voila!
With these plugins, managing the process of ad placement becomes a whole lot easier. You gain finer control over ad display and save both time and effort.
Customising Ad Display on Your Site
Where to put ads on your website?
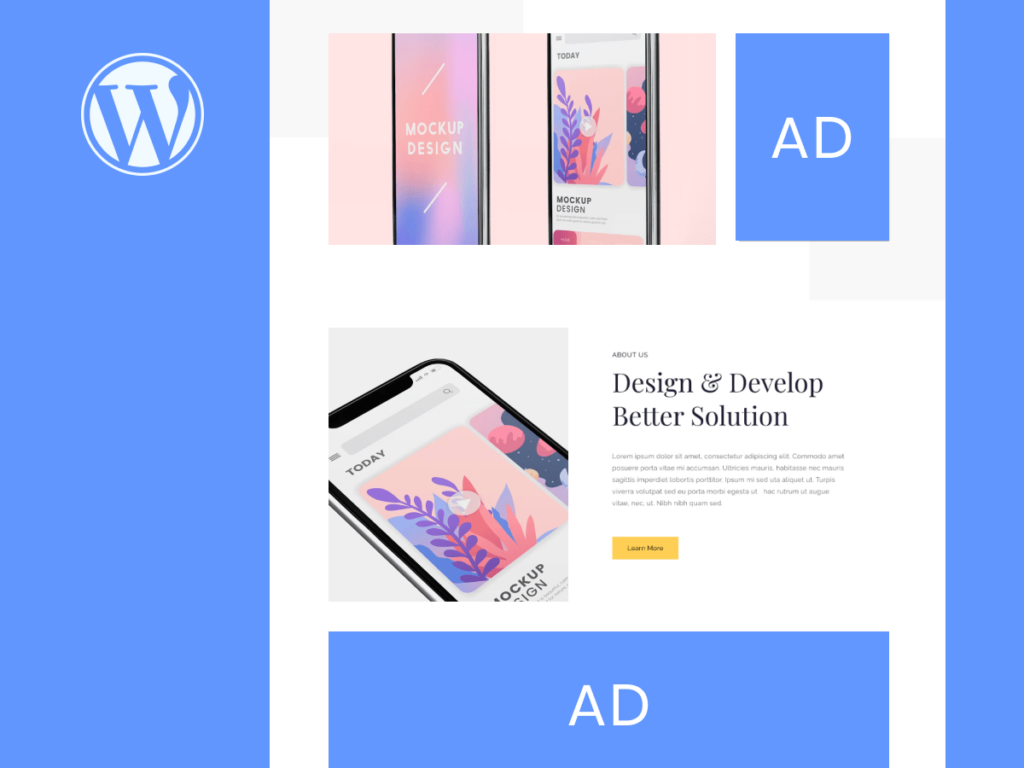
Deciding where to place ads on your website is a critical decision with a profound impact on user experience and ad revenue. The right placement can grab your visitors ‘engagement, while the wrong one can make them frustrated. Let’s dive into some prime real estate spots on your site for these ads.
1. Header: Placing an ad in the header of your site grabs instant attention, as it’s one of the first areas noticed by visitors.
2. Footer: Ads at the footer can catch the visitors who scroll to the bottom of your pages.
3. Sidebars: Sidebars are a popular place for ads, as it is less disruptive to the website’s content.
4. Within Blog Posts: Placing ads within your blog posts is bold and daring and can provide decent exposure. However, be careful not to interrupt the reading flow.
5. Before or After Blog Excerpts: If your homepage displays blog excerpts, placing ads before or after these can work well.
6. Pop-ups: Pop-up ads are intrusive but can have high visibility. They should be used sparingly.
7. Widgetised Areas: These are areas in your theme that allow the insertion of side widgets, including ads.
Remember, it’s all about balance. Imagine your website as a cozy living room – you want to monetize, sure, but you also don’t want to clutter things up. Aim for a harmonious blend of content and ads, ensuring both your pocket and your visitors are happy.
Can I Display Ads on My Homepage Only?
The short answer is yes, you can display ads solely on your homepage. However, it might not be the most effective strategy for boosting your revenue.
While your homepage is the grand entrance of your website and will most likely have the highest traffic, visitors love wandering about, exploring different articles and pages. If you limit ads to just the homepage, you’re potentially missing out on revenue opportunities from other page visits.
Monitoring your site analytics can shed light on which pages or posts attract the most visitors, guiding you to make informed decisions about ad placement.

Balancing Quality Content and Ads for Optimal Revenue
Finding a balance between user experience and ads
Finding the sweet spot between ads and a smooth website experience can feel like juggling. No matter how keen you are to monetise your WordPress blog, it’s paramount to prioritise your visitors’ experience. Here are some tips to follow:
- Don’t Go Overboard With Ads: Sure, it might be tempting to place an ad in every corner of your website, but too many ads can annoy visitors and even slow your website down, leading to higher bounce rates.
- Place Ads Thoughtfully: Strategically position your ads in places where they’ll attract the most attention without distracting from your content.
- Keep Ads Relevant: It’s important that your ads match your content. Platforms like Google AdSense recognise the content on your site and deliver relevant ads to your visitors, enhancing the user experience.
- Use Ad Type & Size Wisely: Experiment with different ad types and sizes to see what works best for your website. A variety might be beneficial—some text ads, some image ads, big ones, small ones, and so on.
- Try A/B Testing: Test various ad placements, types, and strategies to identify the most effective balance of ads and content for your site.
Yet again our pesky reminder, while ads can be a great way to earn, keeping your visitors experience comfortable on your site is the endgame. A happy visitor often means a loyal follower, and that’s priceless.

Using Analytics To Optimise Your Ads & User Experience
Settling on an ad strategy is just the beginning of your journey. It’s equally important to routinely check your ad analytics to understand which ads are driving the most revenue and how your ads are impacting user experience. Here are some tips:
- Monitor Your Click-Through Rates (CTR): High CTRs generally mean that your ads are resonating with your readers.
- Track Your Ad Impressions: Every time an ad shows up, it’s called an impression. Comparing impressions and clicks can help you judge the performance of different ad placements so you get a better idea of where to place ads for maximum impact.
- Review Your Ad Revenue: Track how much each ad brings in. This can help you decide which ads are worth displaying.
- Utilise Built-In Analytics: Most ad platforms come with their own set of tools to help you track how your ads are performing.
- Monitor Traffic & Bounce Rate: If you notice more people leaving your site (bounce rate) after you put up ads, that’s a signal to rethink your strategy.
Always be proactive about making adjustments based on your findings in order to maximise revenue and keeping your site user-friendly and appealing to your audience.
FAQ About WordPress Ads and Monetization
How Many AdSense Ads Can I Display on My WordPress Site?
Wondering how many AdSense ads you can sprinkle across your WordPress site? Technically, there’s no hard limit. But here’s the catch: Your ads, whether they’re text, image, video, or any other kind, shouldn’t overshadow your actual content.
Google’s mantra? Keep it user-friendly. Imagine visiting a park filled with billboards – not the best view, right? Similarly, cramming your site with ads can annoy visitors and might even give you a thumbs down in search rankings.
If you’re familiar with affiliate marketing, you know to be smart about how many affiliate links you place in your blog so that you don’t appear to “salesy”. The same applies here.
How Do I Customise the Appearance of My AdSense Ads on My WordPress Site?
Want your AdSense ads to fit in with your WordPress site’s style? You’re in luck! AdSense lets you tweak your ads so they match your site’s vibe. Here’s a quick guide on how to give your ads a makeover:
- Title Colour: Want your ad title to pop or blend in? Adjust its color to match your site’s main theme or pick a contrasting shade.
- Background Colour: Make your ad’s backdrop match your site’s, so it feels like a natural part of the page.
- Text Colour: Adjust the ad text color to go with your site’s fonts, or pick a shade that stands out.
To modify the ad unit appearance:
- Navigate to ‘Ads’ within your AdSense account.
- Choose the ad unit you want to customise.
- Click ‘Edit ad type’.
- Go to ‘If no ads available’ section and choose ‘Collapse the ad unit, show space’, or ‘Color’.
- Pick the preferred colour and save.
Giving your ads a little style boost can help them blend in or stand out, making them more appealing to your visitors and possibly upping those all-important clicks.
Sources
[1] Google AdSense: https://adsense.google.com/start/
[2] Google Adsense: https://adsense.google.com/start/success-stories/of-life-and-lisa-case-study/
[3] HubSpot: https://blog.hubspot.com/marketing/why-people-block-ads-and-what-it-means-for-marketers-and-advertisers


Submit An App
Seen a cool app you think we should review? Submit your recommendation using our form.